
Pressure Decay Leak Testing
Pressure Decay Leak Testing — How It Works
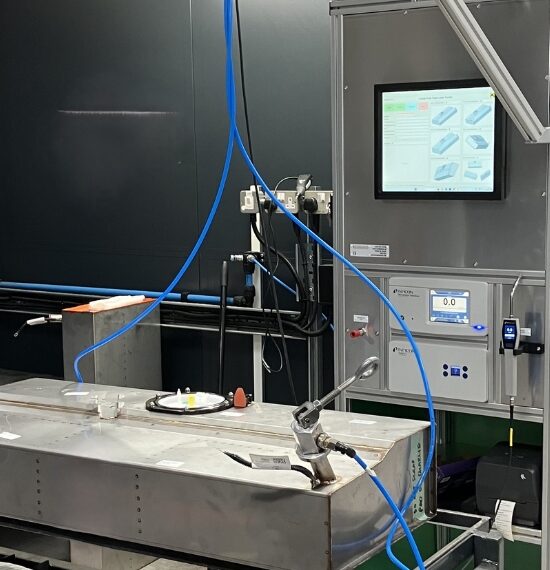
A pressure decay leak test is one of the most widely used methods in production leak testing. The part is pressurised with air to a set test pressure, the supply is valved off, and the pressure inside is monitored over a fixed period. Any fall in pressure beyond the accepted threshold indicates a leak.
It is fast, clean, non-destructive and uses only compressed air — which is why it remains the default choice for high-volume manufacturing where cycle time and cost per test matter. Optimeasure has supplied and integrated pressure decay systems since 2003; this page explains the method, its real sensitivity limits and how to keep results defensible.
The Four Phases of a Pressure Decay Test
Every pressure decay cycle follows the same sequence. Getting the timings right for your part volume is the single biggest factor in repeatability:
- Fill — the part is charged to test pressure. Too short and the part hasn’t equalised; too long and you waste cycle time.
- Stabilise (settle) — the most commonly under-set phase. Compressing air warms it; that heat must dissipate before measurement or the resulting contraction reads as a false leak.
- Test (measure) — the supply is isolated and pressure change is measured over a defined window. Longer windows detect smaller leaks but cost cycle time.
- Exhaust — the part is safely vented and released.
Pressure Decay vs Differential Pressure Decay
▶ Comparing the two measurement approaches
| Absolute (pressure decay) | Differential pressure decay | |
|---|---|---|
| Principle | Measures the absolute pressure drop inside the test part | Compares the test part against a sealed reference volume and measures only the difference |
| Sensitivity | Good — suited to larger leak rates and larger volumes | Higher — small differences resolve against a stable reference |
| Thermal tolerance | More affected by ambient and adiabatic effects | Reference volume cancels much of the common-mode thermal drift |
| Best for | Robust production testing, larger assemblies | Tighter leak specifications and smaller volumes |
Both methods are available across the Optitest leak tester range, and both fall under the air leak testing family covered on our air leak testing page.
Realistic Sensitivity Limits
Under ISO 20485 (which superseded EN 1779), pressure change techniques are categorised by detection limit. In practice, pressure decay spans roughly 10⁻¹ to 10⁻³ mbar·l/s, with the lower end only achievable under highly controlled, laboratory-grade conditions.
On a production floor, reaching less than 10⁻² mbar·l/s reliably requires discipline: well-maintained couplings, hoses and valves, controlled part and ambient temperature, trained operators, and a test volume and parameter set genuinely suited to that leak rate. If your specification demands better than roughly 10⁻³ mbar·l/s, a tracer gas method is the appropriate route — see hydrogen leak detection or helium leak testing.
Why Pressure Decay Tests Give False Results
Most “unstable” pressure decay systems are not faulty — they are fighting physics or maintenance. The usual causes, in order of how often we see them:
▶ Common causes of false readings and how to resolve them
| Cause | Symptom | Resolution |
|---|---|---|
| Adiabatic heating | Consistent apparent leak on every part, worse at higher pressures | Extend the stabilise phase; reduce fill rate |
| Ambient temperature swing | Results drift across a shift or between shifts | Stabilise the test cell; use differential method with reference volume |
| Part temperature | Parts fresh from machining or washing fail; the same parts pass later | Allow parts to normalise before test |
| Seal and coupling wear | Gradual increase in failure rate over weeks | Scheduled seal replacement; leak-check the fixture itself |
| Part deformation | Flexible or thin-walled parts creep under pressure | Longer stabilise; restrain the part; consider lower test pressure |
| Volume mismatch | Test cannot resolve the required leak rate at all | Reduce dead volume in fixturing and pipework |
Calibration and Traceability
A pressure decay result is only defensible if the instrument is verified against a known reference. Best practice is to check the system against a calibrated master leak — a precision orifice with a certified leak rate at a stated pressure, traceable to national standards.
- Daily or shift verification — run a master leak through the full cycle to confirm the system still detects a known reject.
- Annual instrument calibration — pressure sensors and timing verified and certified.
- Fixture leak-check — verify the fixture and seals in isolation, so fixture leaks are never attributed to parts.
Optimeasure provides traceable calibration services using certified leak masters, alongside instrument supply and integration.
Further reading: ISO 20486 and reference leak calibration, and UKAS traceable leak standards.
Applications
Pressure decay leak testing is used wherever a sealed or semi-sealed component must hold pressure: engine and transmission castings, fuel and cooling systems, EV battery cooling jackets, medical devices and consumables, valves and fittings, white goods, and packaging. For sector-by-sector detail, see air leak testing.
Frequently Asked Questions
Complex Testing Requirements?

